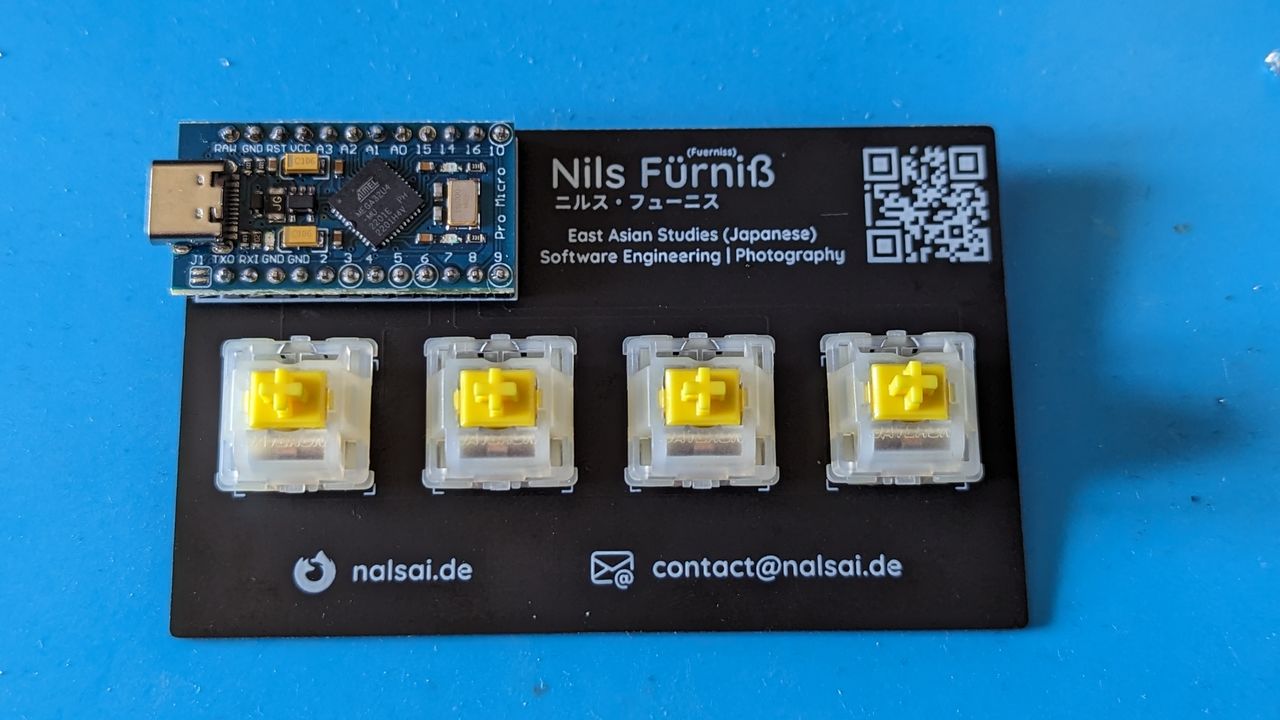
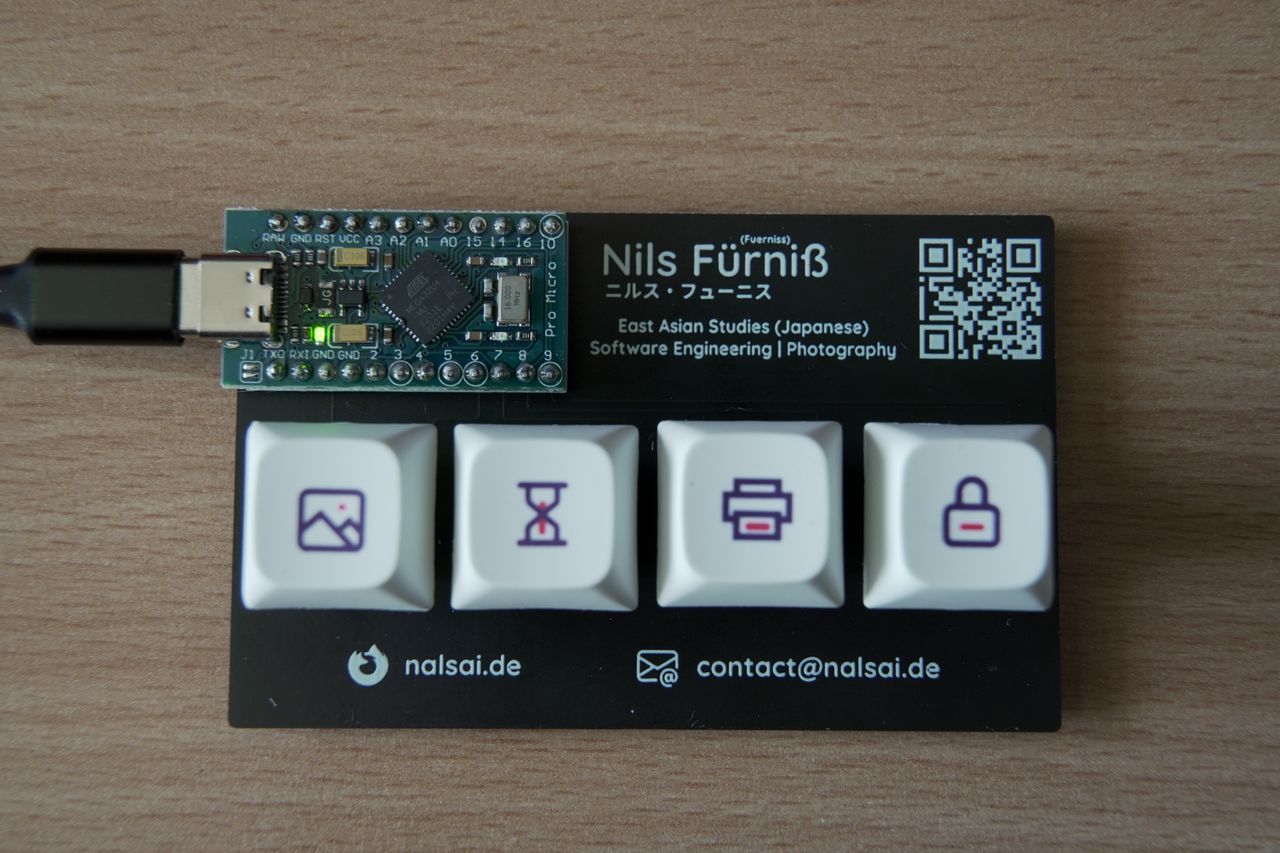
meishi 名刺
My business card, as well as a QMK powered macro keyboard.
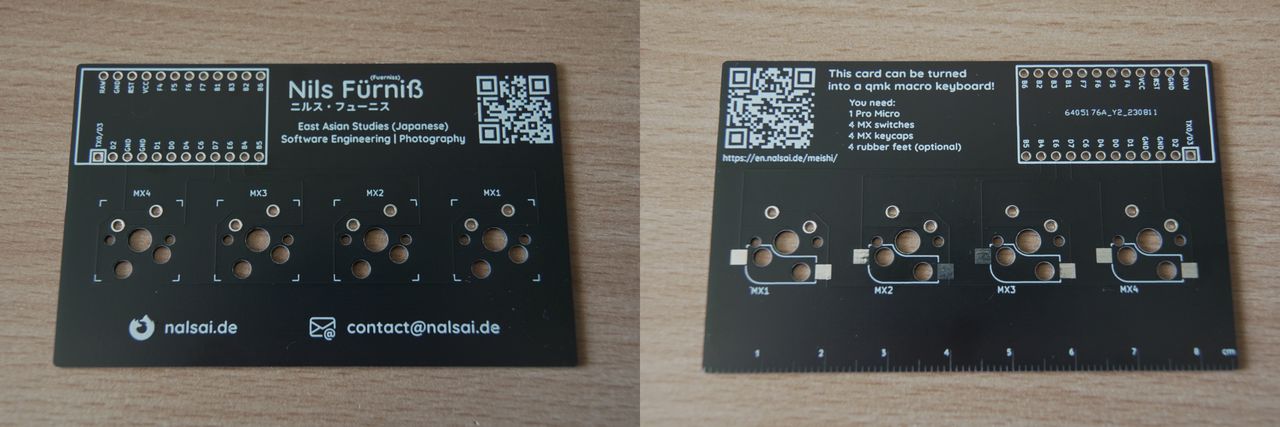
You can find the KiCad files at https://github.com/nalsai/meishi.
Assembly
Parts Needed
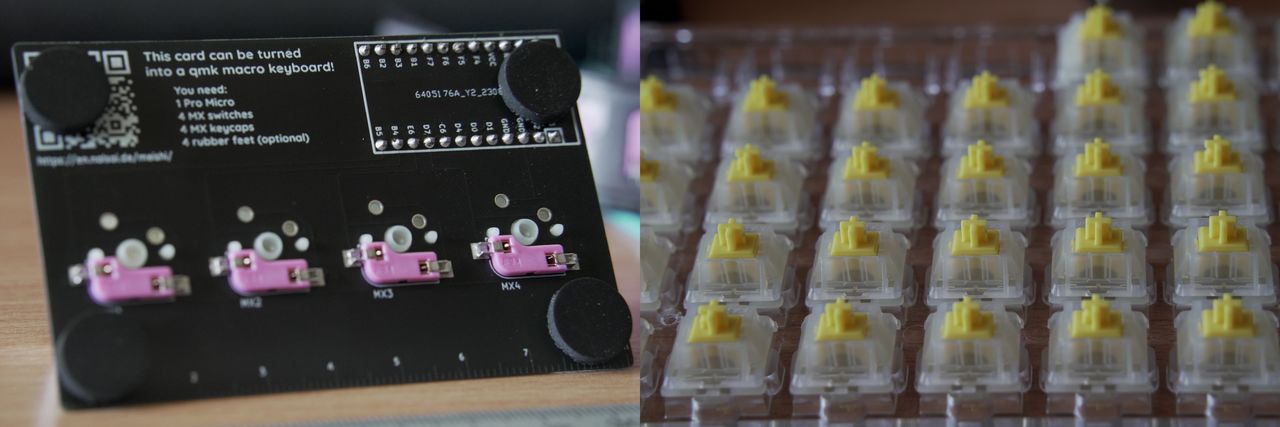
- 1 meishi PCB
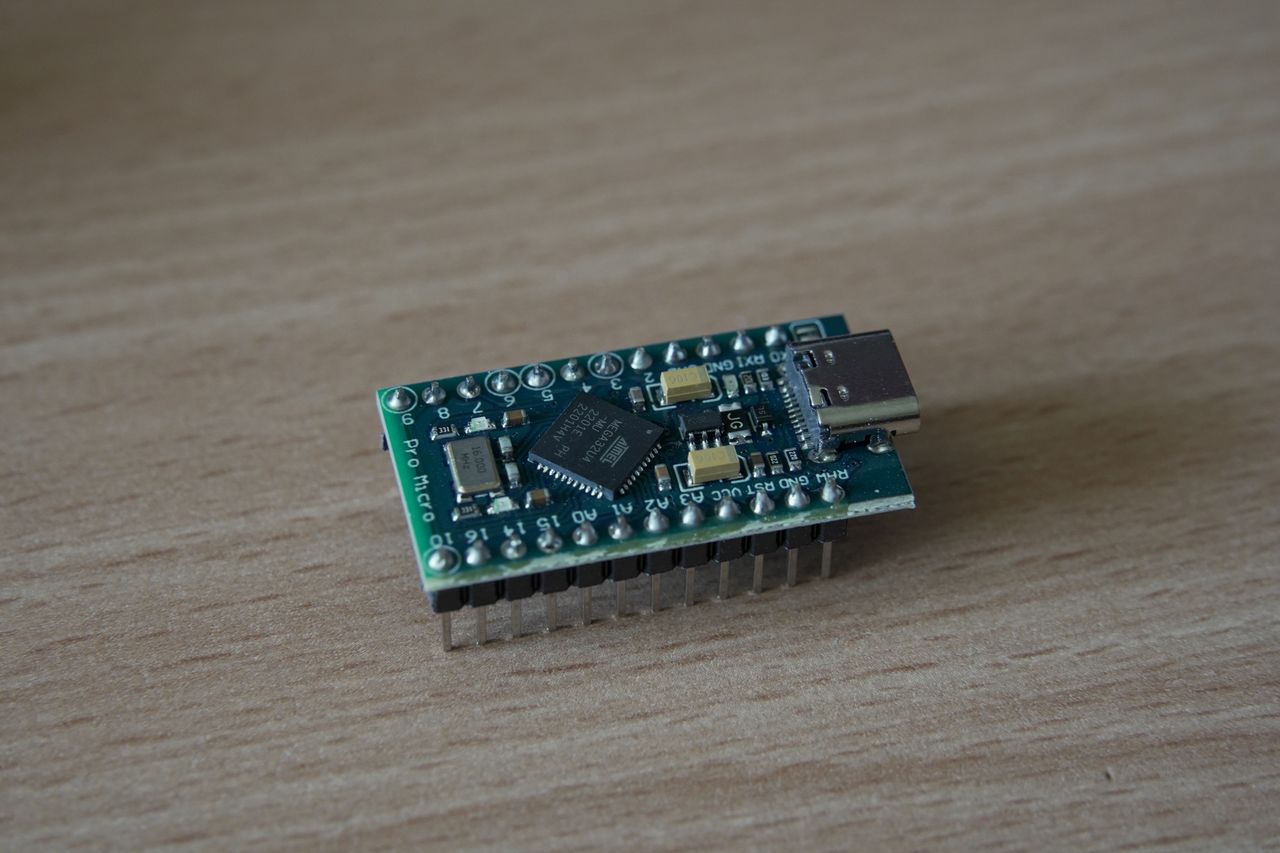
- 1 Pro Micro (with headers)
- 4 MX switches (I used Gateron Milky Yellow Pro)
- 4 MX keycaps (I prefer DSA profile but any profile will work*)
- 4 rubber feet (optional but highly recommended)
- 4 kailh hotswap sockets (optional)
Soldering The Headers To The Pro Micro
Some Pro Micros come with pre-soldered headers, in which case this step is not needed.
(You can use the PCB to help keep the headers straight.)
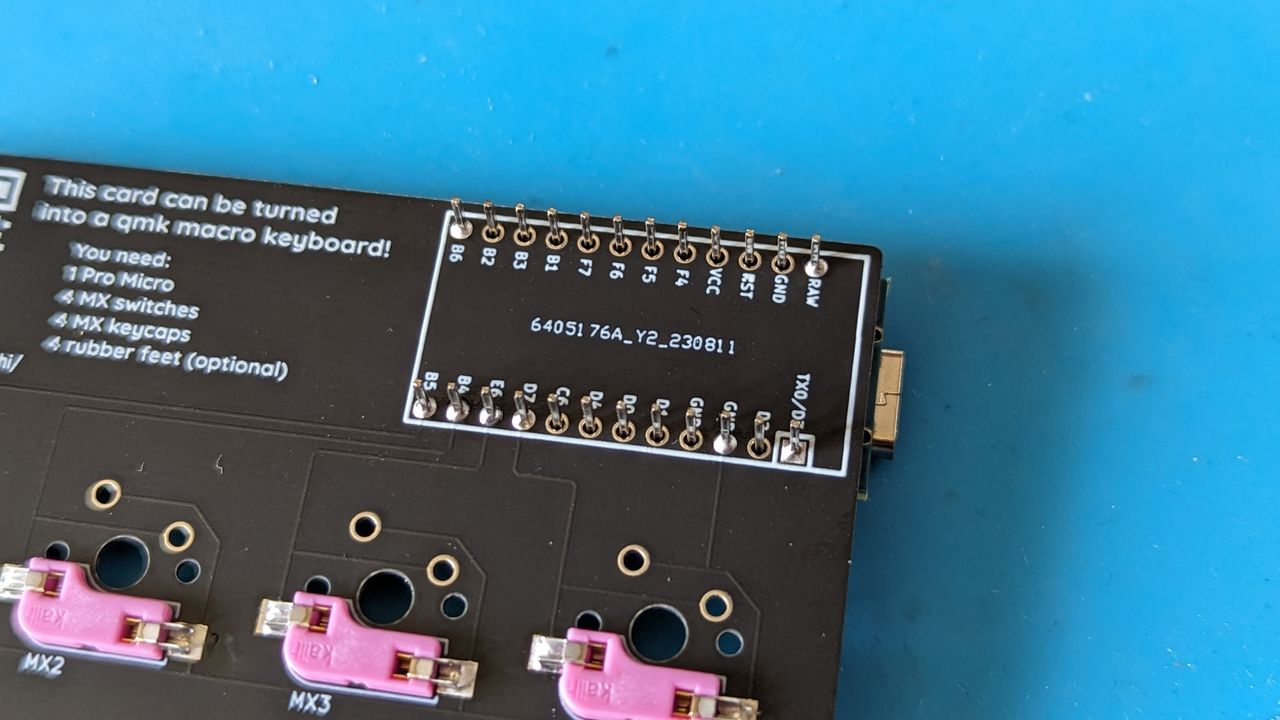
Soldering The Pro Micro To The PCB

Soldering only the pins shown in the image below is enough. (The pins are B5, B4, E6, D7, GND and the pins at the edges to hold the Pro Micro in place.)
Soldering The Switches / Hotswap Sockets
Just put the switches in the holes and solder them from the bottom. (The pins should go through the smaller holes with the silver rings around them, not the large ones, those are for the optional hotswap sockets.)
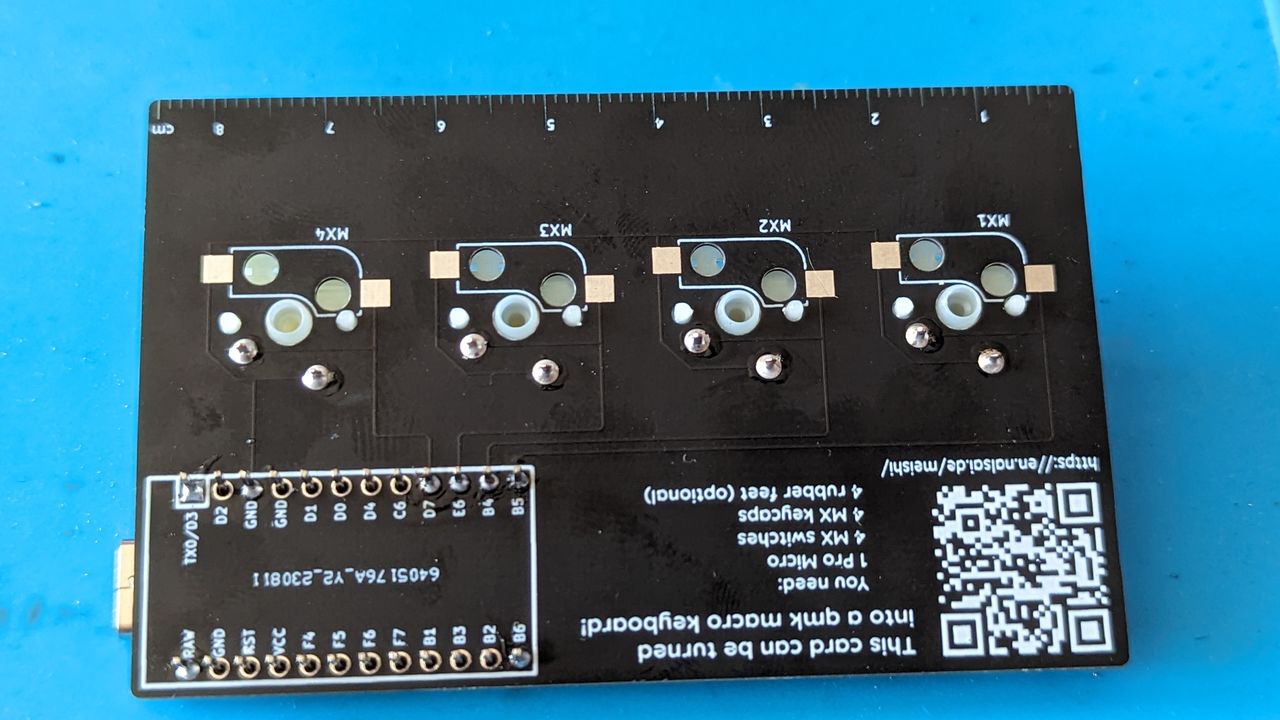
Then you can rotate the board back and insert the switches. (Be careful not to insert the pins into the sockets and not bend them.)

Keycaps
Just put the keycaps on the switches and press them down.
Firmware
Follow the QMK Tutorial for an in depth guide.
If you just want to flash pre-compiled firmware, jump to Flashing Your Pro Micro and follow the GUI instructions.
Compiling
python3 -m pip install --user qmkarch -x86_64 /bin/bash -c "$(curl -fsSL https://raw.githubusercontent.com/Homebrew/install/HEAD/install.sh)".brew install qmk/qmk/qmkarch -x86_64 brew install qmk/qmk/qmkqmk setup nalsai/qmk_firmware -H ~/Documents/qmk_firmware
(Answer y to all of the prompts.)
qmk_firmware/keyboards/nalsai/meishi/info.json and change development_board from promicro to elite_c .Compile the firmware with the via keymap.
qmk compile -kb nalsai/meishi -km via
Flashing Your Pro Micro
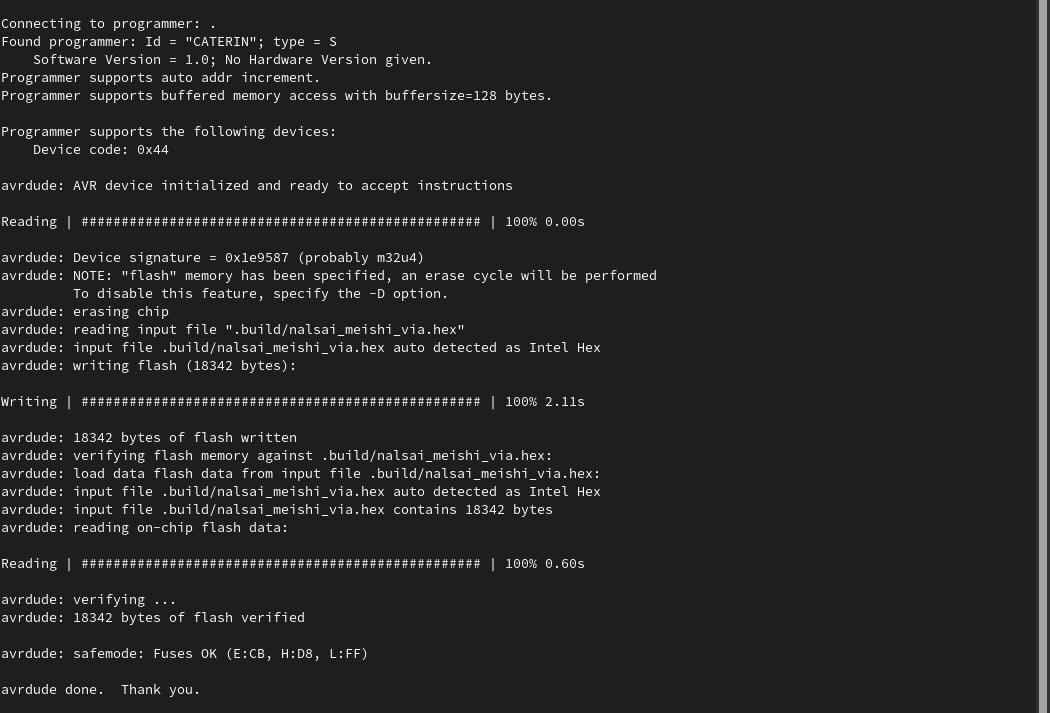
If you want to download pre-compiled firmware, it is available at https://github.com/nalsai/qmk_firmware/releases/latest.
Just click on nalsai_meishi_via.hex to download it.
Run the following command to flash your keyboard:
qmk flash -kb nalsai/meishi -km via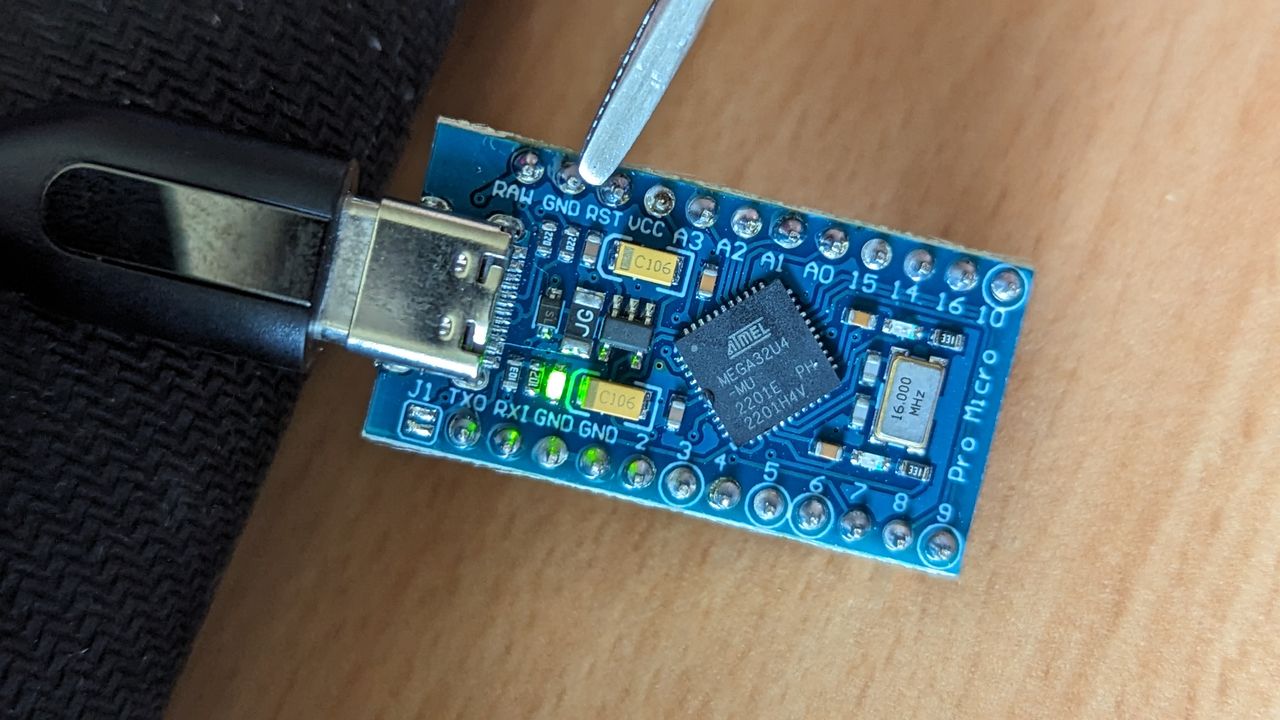
The simplest way to flash your keyboard is with QMK Toolbox.
Run QMK Toolbox (allow it to install drivers when prompted) and select the firmware file.
Now, plug in your Pro Micro and locate the RST and GND pins.
Briefly connect these two contacts using something like metal tweezers, a screwdriver, a paperclip or a loose piece of wire.
You should see a message in yellow, similar to this in QMK Toolbox:
*** DFU device connected: Atmel Corp. ATmega32U4 (03EB:2FF4:0000)
Now, you just need to click the flash button.
You’re Done!
Congrats! Your custom firmware has been programmed to your Pro Micro.
You can use VIA to configure your keyboard with Chrome. (Firefox doesn’t support WebUSB 😭.)
Open https://usevia.app/. Go to the Settings tab and enable “Show Design Tab”. Then go to the Design tab and confirm the warning. Click “Load Draft Definition” and select the nalsai_meishi.json file you can download from https://github.com/nalsai/qmk_firmware/releases/latest.
If your keyboard is plugged in, Chrome should ask you to allow VIA to connect to your keyboard. Select it and click “Connect”. Now you can configure your keyboard on the Configurator tab.

Thanks for the inspiration
- https://medium.com/henngeblog/mechanical-keyboard-business-card-83385aa8bc29 (https://github.com/lukas-reineke/meishi)
- https://github.com/Biacco42/meishi
- https://www.youtube.com/watch?v=rEdWV4Augfc